Introduction
If you need only one or two cups, brewing coffee using a pour over technique is a great option. You can control the process at every step – perfect if you’re very particular – and make only as much as you need.
I usually drink only one cup per day, and there’s no other coffee drinkers in the household. So this method has worked great for me over the past few years. Especially since I have never quite gotten the knack of using a French press!
Equipment for Pour Over Coffee
There’s really only a few must-haves with this method. Note that I’m writing this from the approach of making a single cup. But there’s options for making up to 8 cups.
Must Haves
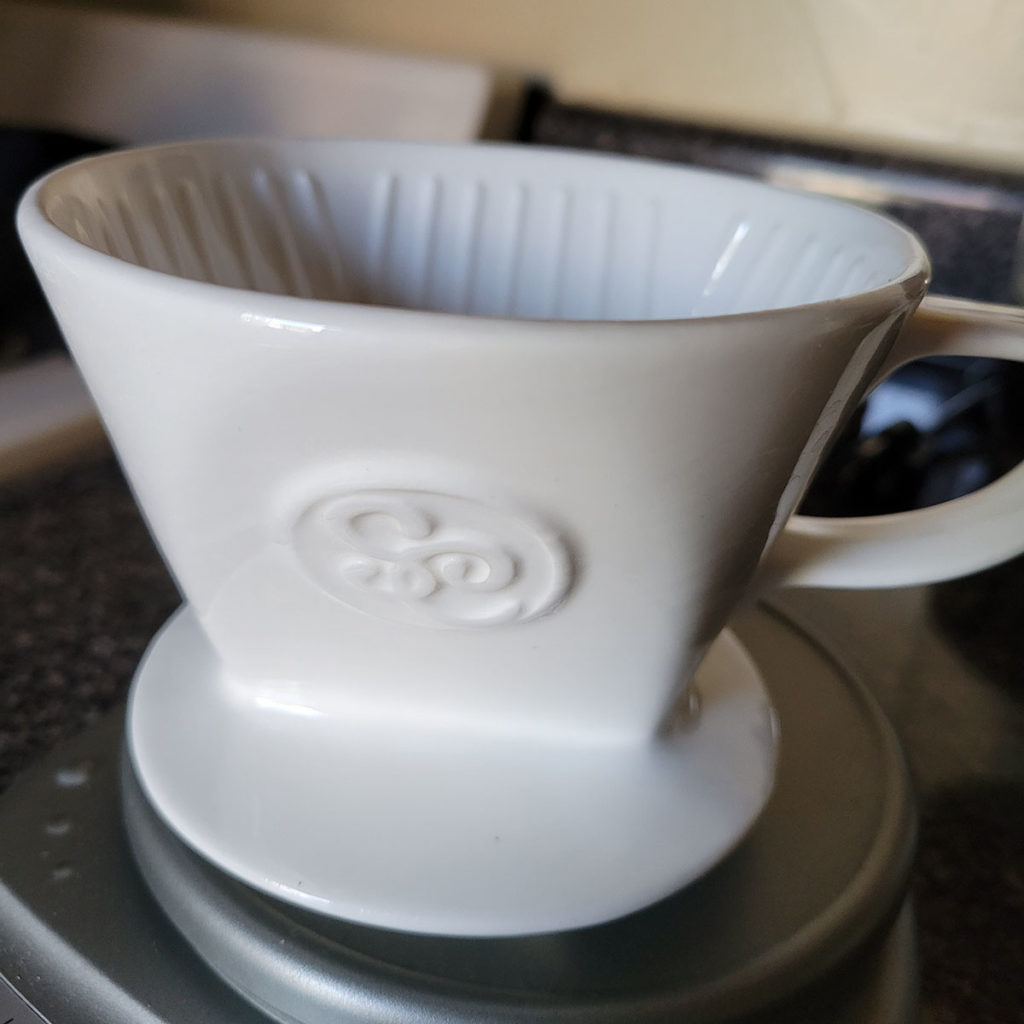
- Pour Over Cone
The type I use sits on top of my coffee mug. I started with a cheap plastic model from Melitta – I wanted to see if it worked for me. It is lightweight, takes a beating, and sits up enough that it’s easy to see the level in the mug. But over time I started getting a little leery of using plastic with hot water so frequently and switched to a porcelain model. It’s noticeably heavier, of course, and I can’t see into the mug while brewing.
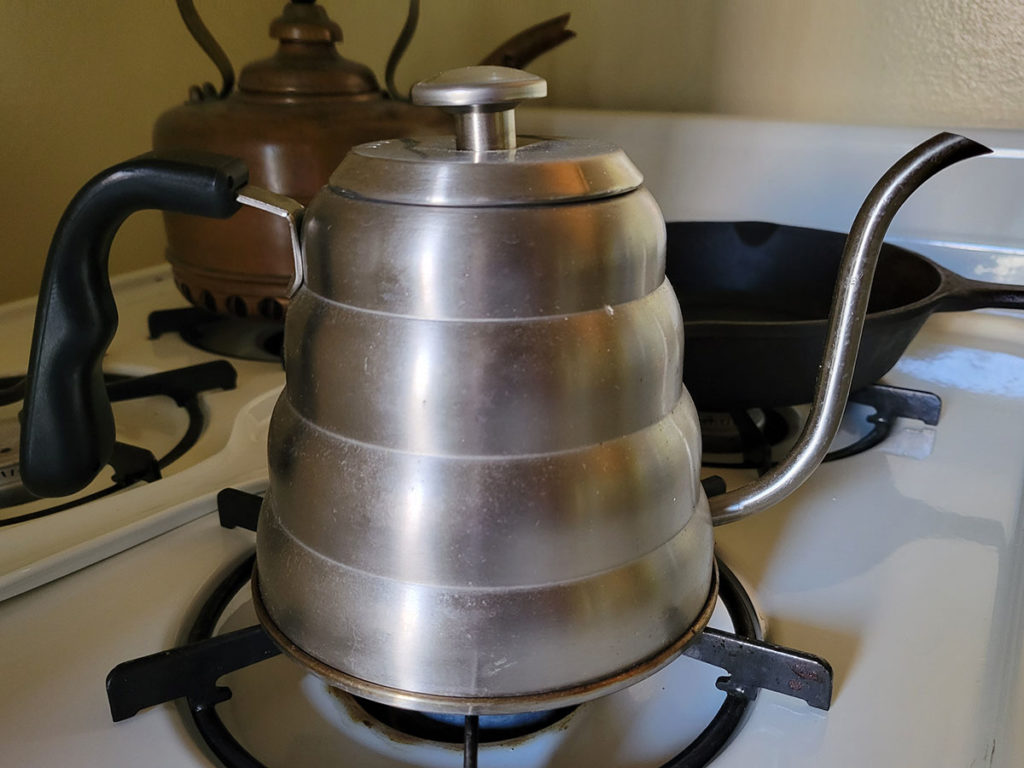
- Way to Heat Water
Just so long as you can control the water stream safely while pouring, you can use whatever you like. Some nice features are the ability to monitor the temperature as you heat the water and a precise pouring mechanism. I started with a standard electric kettle but recently switched to something designed specifically for pour over brewing. It’s made life much easier!
- Filter to Fit Cone
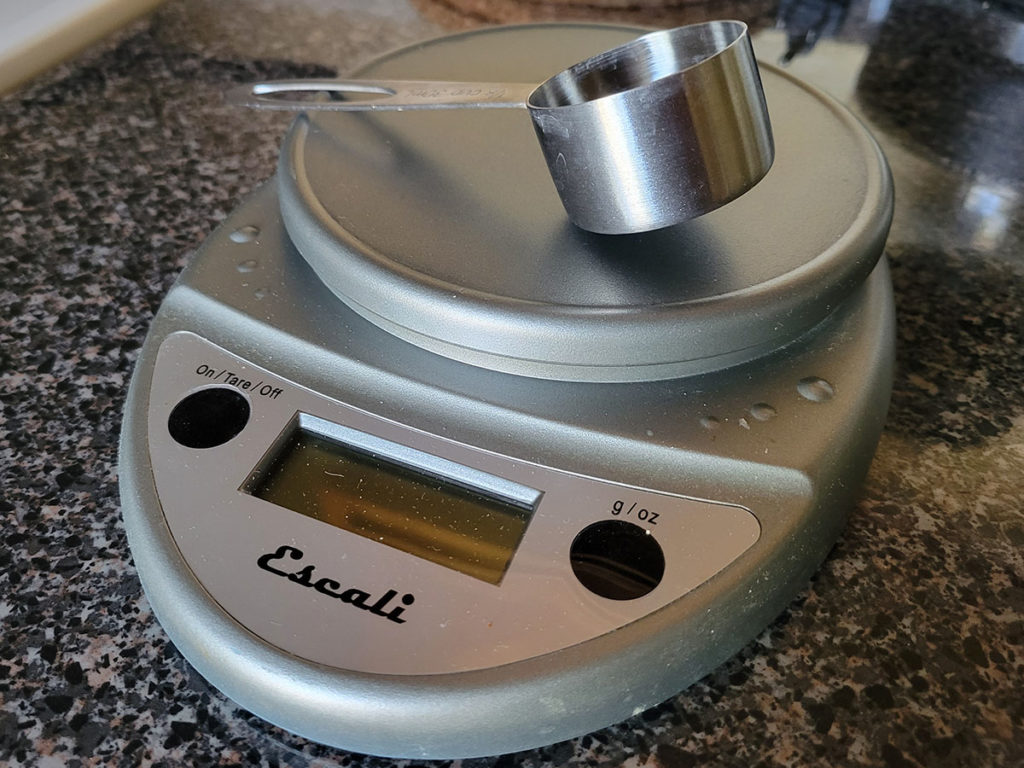
Most of the cones appropriate for making a single cup of coffee take a standard #2 cone filter. You can get cones that are designed to be used without filters – saving on that waste – but it’s a matter of taste whether they work for you. I’ve tried one of these filter-free models and discovered I don’t like the oils that remain with this style – the superfine mesh traps (most of) the grounds but not the oils. - Way to Measure the Coffee Grounds
I use a dedicated scoop (it’s a 1/8 cup measure – about 2 tablespoons). Another option is to weigh the grounds.
Optional
Depending on the degree of control you want over the entire process, you might need a couple more tools:
- Scale
This is something I’ve recently added to my brewing routine. It makes it easier to get consistent results when you weigh the entire brewing rig while adding the water. Especially with my porcelain cone since I can’t see into the cup while it’s sitting on top! I’ve used an Escali scale in the kitchen for years without any problems. - Coffee Grinder
I’m not picky enough (yet) to try grinding my own beans. But those who are more particular than I will likely want to use one. Go with a burr grinder – and no need for a large model if you’re just making one or two cups at a time. I’ve heard that a medium-fine grind – similar to sea salt – is best. I tend to just get coffee that is ground for drip brewers and haven’t had any issues.
Pour Over Technique
The basics of making pour over coffee are pretty much what they sound like: pour hot water over coffee grounds into a receptacle. As with so many things, of course, it’s the details that will make or break the quality of the end result. You can choose to weigh everything as you go along – I use a mix of volume and weight measurements.
Prepare the Coffee Grounds
If you’re grinding your own beans, do so.
I use a generous 1/8 cup of coffee per cup. That winds up being about 15g/0.5 oz.
Put the filter in your cone, pressing slightly to open it up. At this stage, a lot of of people recommend rinsing the filter to eliminate any paper flavor. I must admit, I’ve never bothered. But, as I’ve hinted, I’m not the most particular person when it comes to certain aspects of the coffee prep.
Put the ground coffee in the filter.
Heat the Water
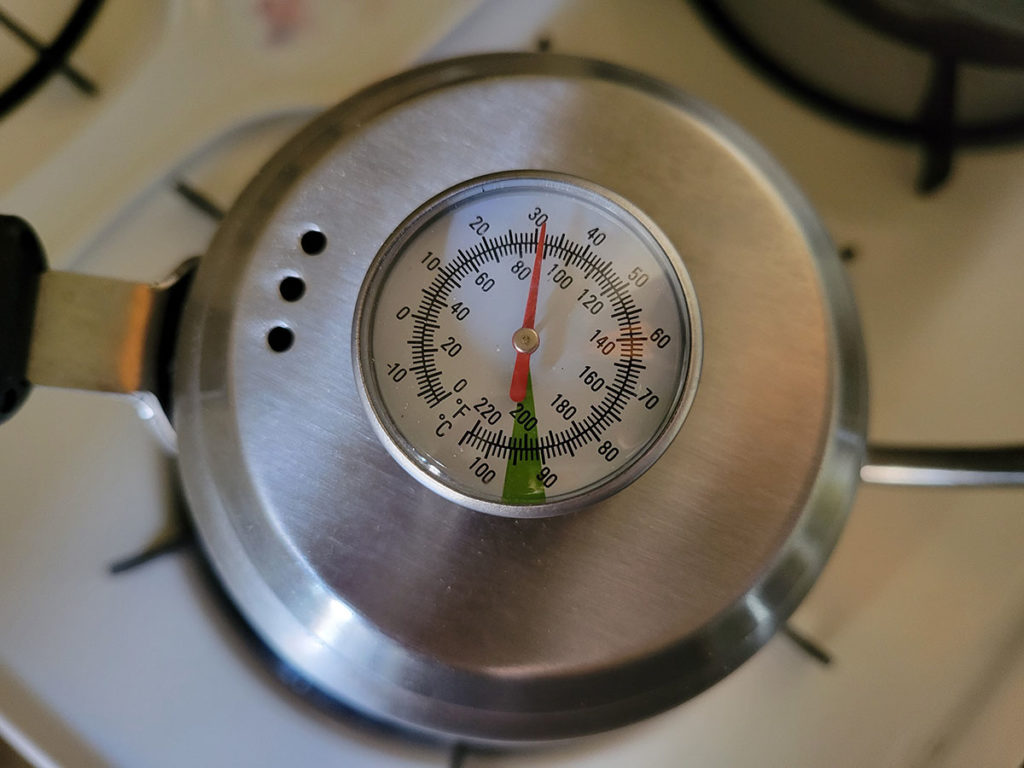
You don’t want boiling water – it tends to make the coffee too bitter. For me, the sweet spot is just under 200F/93C. The lid of the pour over kettle I use has a built-in thermometer that I use to monitor the temperature.
Pour the Water Over the Grounds
Once your water is to the right temperature, pour a little over the grounds, just enough to moisten them. Let them settle a moment and then continue in a slow, steady stream. This is to ensure none of the grounds stay dry and to release any CO2 that wants to bubble out of them.
Move the water stream around the perimeter of the coffee grounds, making sure the edges of the filter don’t fold down. Monitor how much water you’ve added, either on your scale (if using) or visually.
I usually use a standard, large mug and find that 15oz of water on my scale gives me the right amount of coffee with enough room left to add cream 🙂
Experiment with different proportions of coffee grounds-to-water to find the results that work for you. If you’re only making one cup at a time, it’s pretty easy to tweak from brew to brew. I highly recommend keeping notes as you test!
Finish and Enjoy
Cleanup is easy – remove the filter with grounds and dispose of it. Wash the cone.
If you compost – and use an appropriate filter type – add to your pile. Unfortunately, I don’t have access to composting in my apartment complex (but keep hoping my municipality will add it as an option).
Add any amendments you prefer and enjoy!